Showing posts with label recipes. Show all posts

Thursday, 17 January 2013

Outrageous Chocolate Cookies!


I know – posting about something that is not cupcake related – outrageous! But I tell you what, this cookie recipe is AMAZING and certainly lives up to it's name, it certainly is outrageous.

I came across this recipe when trolling the Martha Stewart website. The reason why it caught my eye was because I thought the proportion of the ingredients were wrong. But from all the comments I saw on the webpage, everyone was raving about the recipe just as it is. So I had to give it ago. However, I did make a few variations.

Here is my take on the recipe.


Outrageous Chocolate Cookies

Ingredients
277 grams of 70% cocoa dark chocolate
60 grams of salted butter
2/3 cup of plain flour
½ teaspoon of salt
2 large eggs (600 grams)
¾ cupcake of packed brown sugar
1 teaspoon of vanilla bean paste
100g of dark chocolate chunks or chips
100g of milk chocolate chunks or chips
100g of white chocolate chunks or chips
40g of raisins


Method
1.      Heat the dark chocolate and butter in the microwave at 20 second increments, stirring between each, until the chocolate mixture is melted. Be careful not to overheat the chocolate mixture.
2.      In another bowl, shift together the flour and salt.
3.      In a mixing bowl, whisk (by hand) the eggs, brown sugar and vanilla until combined. Gradually add the melted chocolate into the mixture. Mix in the flour mixture until just combined. Stir in chocolate chunks or chips and raisins.
4.      Spoon the dough in the centre of a sheet of gladwrap 1m in length, in the shape of a log. Wrap the gladwrap around the dough and roll the dough into a circular log, approximately 5cm in diameter. Freeze the mixture for 30 minutes.
5.      Preheat oven at 170°C (150°C fan force).
6.      Remove the dough from the freezer and unwrap the dough from the gladwrap. Cut the dough at 1cm intervals. Place the dough onto baking sheets approximately 3cm apart.
7.      Place the cookies in the oven and bake, rotating sheets halfway through, until cookies are shiny and appear crackly on the surface (approximately 15 to 18 minutes). Allow the cookies to cool on the baking sheets.

Thanks Martha Stewart - this recipe was yum!


Wednesday, 25 January 2012

Good Australian!

I may be a bad Asian, but I am most certainly not a bad Australian - and to prove it I made Australian themed cupcakes! Afterall, tomorrow is Australia Day (26th January) and what better way to celebrate than with Australian cupcakes!

So what is Australia most known for, other than kangaroos, koalas, vegemite and our great beaches? Well, lamingtons of course (vanilla sponge dipped in chocolate and coated in desiccated coconut)! Yes, you better believe it, I made lamington inspired cupcakes. How, you ask? Well you start by making a batch of vanilla cupcakes. You can find the recipe of my vanilla cupcakes here.

While the cupcakes are baking and then cooling, you can get started on the chocolate coating.

Chocolate and desiccated coconut coating

Ingredients
200 grams of dark chocolate
2 cups of thickened cream
2 teaspoon of vanilla bean paste
Generous amount of desiccated coconut

Method
  1. Melt the chocolate in the microwave for 30 second intervals on high. At the end of each 30 second interval, stir the chocolate. Continue this process until the chocolate is completely melted.
  2. Mix the thickened cream and vanilla bean paste in the melted chocolate. Stir the mixture thoroughly until all the ingredients are well combined. Set the chocolate mixture aside to cool.
  3. Pour a generous amount of desiccated coconut into a large container and set aside.

Once the cupcakes are cooled, remove the cupcake bases from the cupcake wrappers. Dip the cupcakes into the chocolate mixture and then cover the chocolate dipped cupcake with desiccated coconut. Make sure the cupcakes are completely covered with the desiccated coconut. Once you have coated all the cupcakes, leave them aside to set.

A cupcake is not a cupcake without some form of icing or frosting. So while the cupcakes are setting beat some thickened cream until it is nice and firm. This can take some time, so while this happening place a blob of strawberry jam on top of the lamington cupcake base. Once the cream has thickened, pipe the cream on top of the blob of jam on the lamington cupcakes. And voila, there you have it, lamington cupcakes with jam and cream. I assure you, it does not get better than this!

To complement the Australian lamington cupcake, I made an Australian flag topper and fondant cupcake topper of the map of Australia. As you can see, I replaced Tasmania with a good old Aussie AFL (Australian Football League) footy. How Australian!


After all,
I am, you are, we are Australian! 

Monday, 12 December 2011

Flourless cake (I know, crazy right?)

The internet never ceases to amaze me. The internet has truly transformed our lives. We have access to so much information at the touch of our finger tips. Not only that, but the internet connects people all over the world – family and friends can communicate on facebook and celebrities can communicate with their fans on twitter. It is seriously mind blowing! I mean two weeks I became friends with Finn Hudson and Rachel Berry on facebook. Yes, I am friends with the Glee fictional characters on facebook - I mean, seriously how cool is that?!

Whenever I am keen to try a new cupcake recipe the first thing I do is look up recipe ideas on google. I have a countless number of cupcake recipe books but nevertheless I turn to google before I even glance at a recipe book! And last week was no exception.  

Last weekend was the engagement party of a very close family friend. Sadly, Brendyn and I were not able to part take in the festivities as the party was hosted in Melbourne and we both were unable to take leave to make the trip. Although we could not make the grand event, our cake pops made the trip (courtesy of my in laws)! The bride-to-be requested that the cake pops be made of flourless chocolate cake. At that point in time, I had never ate flourless chocolate cake before, let alone bake it! But wanting to play it cool, I told the bride-to-be “Of course I could make flourless chocolate cake pops!”

I must admit, my first reaction to the notion of flourless chocolate cake was “WHAT THE?!” How can a cake be flourless and if it is flourless, it must taste disgusting. Given that this was the first time I was exposed to this crazy notion of flourless cake, the first thing I did was google “flourless chocolate cake recipe” and was presented with this link. So I gave this recipe a go and to my surprise this flourless chocolate cake recipe was delicious! I particularly enjoyed the texture of cake and its moistness. I think it was the almond mill that gave it the wonderful rough texture. I will definitely give this recipe a go again!

The cake was so moist that I did not even need to add frosting to the cake to make cake balls for the cake pops! All I had to do was crumble the cake, roll it into balls and stick a lolly pop stick into it. I then dipped the cake balls into white chocolate that was coloured yellow and green. The next day, I added the finishing touches to the cake pops – I drizzled white chocolate over the top of each cake pop. The engagement party invitation were yellow, green and white. So to keep to theme, the cake pops had to be the same colour…of course!


This recipe was seriously all things delicious. If you ever keen to give flourless chocolate cake a go, let it be this recipe. You will not regret it!

Saturday, 10 December 2011

Recipe release: FML Vanilla Cupcakes

As you know, I love a good FML cupcake (Fluffy, Moist and Light). I especially love a good old fashion FML vanilla cupcake. I find that vanilla cupcakes are cupcakes in its rawest form. A vanilla cupcake is either good or bad - there is no in between. There is no hiding a bad vanilla cupcake, no matter how you dress it up with sprinkles or toppers. Although a bad vanilla cupcake is very disappointing, a good vanilla cupcake is overwhelming delicious! Nothing beats a yummy vanilla cupcake with a hot English breakfast cuppa! Ladies and gents, am I right or am I right?!

It has taken me a while, but I think I have discovered the perfect FML vanilla cupcake recipe. This recipe has yet to fail me, so in my books it's pretty much near perfect. The search for me is finally over and hopefully for you too. So have a go at this vanilla cupcake recipe and let me know what you think.


VANILLA CUPCAKES
Recipe makes approximately 16 normal sized cupcakes

Ingredients
120 grams of salted butter
2 teaspoons of vanilla bean paste (which is quite expensive, so for a cheaper alternative use vanilla extract)
150 grams of caster sugar
2 large eggs
185 grams of self-raising flour
1/2 cup of milk
16 normal sized cupcake patties

Method
  1. Preheat the oven to 180 degrees Celsius (or 160 degrees Celsius if you are using a fan forced oven).
  2. Beat butter on full speed until it turns a pale shade of white.
  3. Add vanilla bean paste or vanilla extract to the butter and continue beating.
  4. Gradually add caster sugar to the mixture and continue beating until the mixture is light and fluffy. This can take a while, so I tend to sift the flour a few times as I let the beater do its thing.
  5. Add one egg at a time into the mixture and beat well on full speed.
  6. Turn the mixer speed down and add half the flour and milk to the mixture. Beat until the flour and milk is combined. Add the remainder of the flour and milk to the mixture and beat until combined.
  7. Spoon the mixture into the patty pans. Fill the patty pans 3/4 of the way full if you would like the cupcakes to rise above the cupcake patties or 1/2 of the way full if you would like the cupcakes to rise to the rim of the cupcake patties.
  8. Bake the cupcakes for 15 to 20 minutes in the oven. Check that the cupcakes are cooked with a skewer.
  9. Take the cupcakes out of the oven and cool.

Baking tips I have learnt over time:
  • When it comes to baking, always buy full cream, full fat, full goodness ingredients! Otherwise, you may end up with bland tasting baked goods and let's face it, no one likes bland tasting bake goods, especially bland cupcakes!
  • You can never over beat the butter, sugar and eggs. However, once you have added the flour and milk to the mixture, you want to beat it as little as possible.
  • Under cook the cupcakes, i.e. when you use a skewer to check whether the cupcake bases are done, take the cupcakes out of the oven when the skewer comes out with a little bit of crumbs (basically not when it is entirely clean). Then leave the cupcakes in the tray for 10 minutes to cool. The cupcakes will continue to cook in the cases but will not cause it to dry out. Thereby creating and nurturing a perfect FML cupcake environment.

A cupcake is not a cupcake without icing. So one must always ice their cupcakes! Here is the recipe for a vanilla buttercream icing I tend to use. Once again, this recipe has yet to fail me.


VANILLA ICE-ICE-ICING

Ingredients
125 grams of salted butter
250 grams of pure icing sugar
2 teaspoons of vanilla extract
1 tablespoon of milk or cream
Pinch of salt

Method
  1. Beat butter on full speed until it turns a pale shade of white.
  2. Add the vanilla extract, milk or cream and salt to the butter and continue beating.
  3. Sift icing sugar thoroughly to ensure no lumps! No matter how slack you are feeling, you must sift the icing sugar thoroughly.
  4. Gradually add the icing sugar to the mixture and beat until the mixture is fluffy and smooth.

And that's all folks! Simple as one, two, three, A, B, C.  Like I said, if you give this recipe a go, let me know how you get on with it.

Here is a photo of some FML vanilla cupcakes I made for a 50th birthday.

Monday, 12 September 2011

The X Factor revealed

So it has been a while since I released a recipe and time is of the essence, so I thought today seemed like a nice enough day to do so. Sadly, I cannot claim this recipe as my own as it is not. I like to refer to this recipe as the X Factor, whereas others like to refer to it as vanilla syrup. Personally, I think X Factor sounds far more exciting. Anyway, I must give credit when credit is due; I got the recipe from Cake Chic by Peggy Porchen. Beautiful book – the cupcakes in this book is just simply breath taking.

X Factor (aka vanilla syrup)

Ingredients
5 tablespoons of water
75 grams of sugar
½ vanilla pod seeds
1 teaspoon of vanilla extract

Method
1. Place water and sugar in a deep saucepan and bring it to boil.
2. Once cool, stir in the vanilla pod seeds and vanilla extract.
3. Ideally, let the syrup infuse overnight to bring out the vanilla flavour.
4. You can store the syrup by keeping it in an airtight container inside the fridge (it should last up to a month).

Basically once you finish baking your cupcakes, let the cupcakes cool for 10 minutes and then brush the X Factor over the top. Make sure you give the cupcakes a generous brush. The X Factor makes the cupcakes nice and moist (without making it dense). I have found that the cupcakes, even after a few days, are still quite moist. I am not sure whether this is the result of applying the X Factor or not, but since using the X Factor, I am telling you, my cupcakes taste different, better different that is. I know I don’t sound much of a baker, given that I don’t even know why brushing vanilla syrup over cupcakes makes them yummier, but I openly admit that I am learning about cupcakes as I go. So please, bear with me. Give the X Factor ago and let me know if it adds anything to your cupcake.

Sunday, 19 June 2011

Recipe release: Mint Slice cupcakes

A number of people have requested my Mint Slice cupcake recipe and wanting to share the cupcake love, I have decided to post the recipe on my blog. It is surprisingly quite simple!

Firstly, you need to make a batch of chocolate cupcakes. Any chocolate cupcakes will do the trick. I usually make my trustworthy Lindt chocolate cupcakes that has yet to fail me. If you are feeling a little lazy, I would suggest using Ms Crocker's moist chocolate cupcake mix. Just for the record, since making the baking from scratch pledge, I have not cheated with Ms Crocker. I have been faithful! I still have two boxes of Ms Crocker's cake mix in my pantry. So they are up for the taking if anyone wants them.

Oh dear, I seem to have gone off track. Let's get back to talking about the wonderful world of Mint Slice cupcakes. Once you have prepared the cupcakes, leave them aside to cool. While the cupcakes are cooling, you can work on the all important frosting. First, you need to make the mint frosting. You will find that your electrical beater will get an absolute beating (get it, get it?! Electrical beater, getting a beating. I just LOL!) making the Mint Slice frosting as your electrical beater will be on the entire time. To begin with, beat 90 grams of salted butter (at room temperature) until the butter is pale. Add 3 tablespoons of thickened cream, 1 teaspoon of vanilla extract, 5 teaspoons of peppermint essence and continue to beat well until all of the wet ingredients are well combined. Add 4 cups of sifted icing sugar - add one cup at a time and beat well. Lastly, add a pinch of salt for luck and yes, you guessed it, beat well. There you have it, mint frosting (this should be enough frosting for icing approximately 24 cupcakes).

Put the Mint Slice frosting aside and now get started on the dark chocolate frosting. Ok, so I can't claim credit for this icing as I modelled my dark chocolate frosting from Martha Swift's and Lisa Thomas' 'Cupcakes from the Primrose Bakery' recipe book. So this is me giving due credit when credit is due (FYI - their cupcakes are AMAZING! I cannot wait to visit their bakery when I visit London next year!). Firstly, beat 250 grams of salted butter (at room temperature) until the butter is pale. Add 1 tablespoon of thickened cream, 1 teaspoon of vanilla extract, 150 grams of melted dark chocolate and continue to beat well until all of the wet ingredients are well combined. Add 250 grams of sifted icing sugar - add one third of the icing sugar at a time and beat well. Once again, add a pinch of salt for luck and beat it!

By the time it takes you to make the two frostings, your chocolate cupcakes should be cooled. Pipe the mint frosting on top of each cupcake by starting from the centre of the cupcake and rotate the piping bag in a simple circular motion. Only pipe one layer of the mint frosting - I know fellow mint lovers would be tempted to pipe more but resist the temptation! Once you have piped all the cupcakes with the mint frosting, pipe on the dark chocolate frosting in a similar way, but instead of piping one layer, pipe the dark chocolate frosting into an icing tower (I am not sure if that is the correct icing terminology?). If you are confused, please refer to the image below.


There you have it! Mint Slice cupcakes.

Sunday, 8 May 2011

My raspberry frosting (yes Gina, I know it is your favourite)!

I am not a very adventurous person and especially with respect to baking, I always stick to the recipe and when I find a good recipe I keep using it! Having said that, in the wee hours of one morning when making cupcakes for my workplace, I decided to do something crazy and out of control, instead of following my usual vanilla frosting recipe I decided to add raspberry jam to it (I know crazy)! This left the frosting looking and tasting a bit off – not quite vanilla, not quite raspberry.  I had to think fast and improvise, I remembered I had a packet of frozen raspberries in the freezer and decided to throw in handful. This made the frosting turn into a bright pink colour and tasted amazing! I piped the raspberry frosting onto the mini cupcakes and this was the final product:


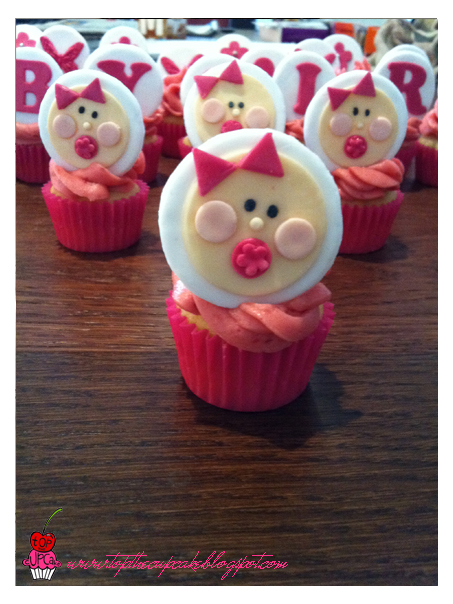
I have used the frosting since and it has never failed me. I love the natural vibrant colour that the raspberries add to the frosting. I recently used the frosting for the cupcakes I made for my friend’s baby shower. Knowing how bright the frosting is, I made the fondant toppers to match the frosting colour.  The frosting together with the toppers really made the cupcake set!


It doesn’t really seem fair that I am going on and on about this raspberry frosting of mine and not allowing you to have a taste of it! So, for my fellow bakers, here is the recipe:

Raspberry frosting
Ingredients
  • 250 grams of salted butter
  • 500 grams soft icing sugar
  • 1 teaspoon vanilla extract
  • 2 tablespoons of raspberry jam
  • Handful of raspberries

Method
  1. Sift icing sugar thoroughly and set aside.
  2. Beat butter until the butter becomes pale (almost white).
  3. While the mixture is beating, slowly add half of the sifted icing sugar to the mixture.
  4. Add vanilla extract and the remaining icing sugar.
  5. Ensure that the mixture is thoroughly combined before adding the raspberry jam and raspberries.  
  6. And now for the secret ingredient, add a pinch or two of salt to counter the sweetness of the frosting.  
NOTE: If you are working with frozen raspberries, you may find that the frosting may be a tad tough to work with due to it being slightly frozen. When you place the frosting in your piping bag, rub the piping bag between your hands. The warmth of your hands should make the frosting easier to pipe out.

Enjoy!

Gina, now that you have the recipe you can now make it yourself! :)